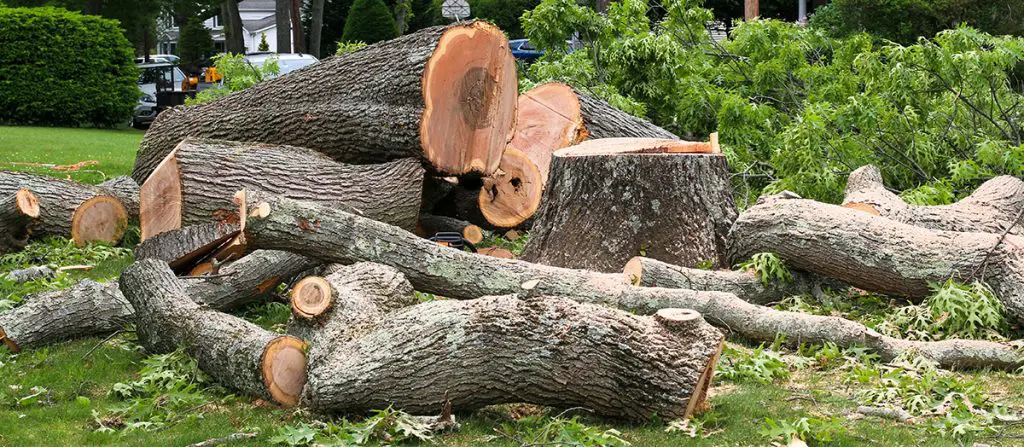
After tree removal services in NJ, the work isn’t over. You’re often left with a stump, piles of wood chips, leftover roots, compacted soil, and torn-up lawn.
What happens next includes stump grinding or removal, hauling away debris, fixing the soil, and restoring your yard.
This complete guide explains what you need to do after tree removal—especially if you live in New Jersey. You’ll find helpful tips on soil prep, replanting, and post-removal safety, plus a step-by-step timeline to bring your yard back to life.
The Day After Tree Removal: What to Expect
Once the tree is gone, it’s easy to think the hard part is over. But what most people don’t realize is that tree removal leaves behind more than just an empty spot. The area often looks messy and uneven—and in many cases, it’s not safe or ready for planting, building, or even walking across.
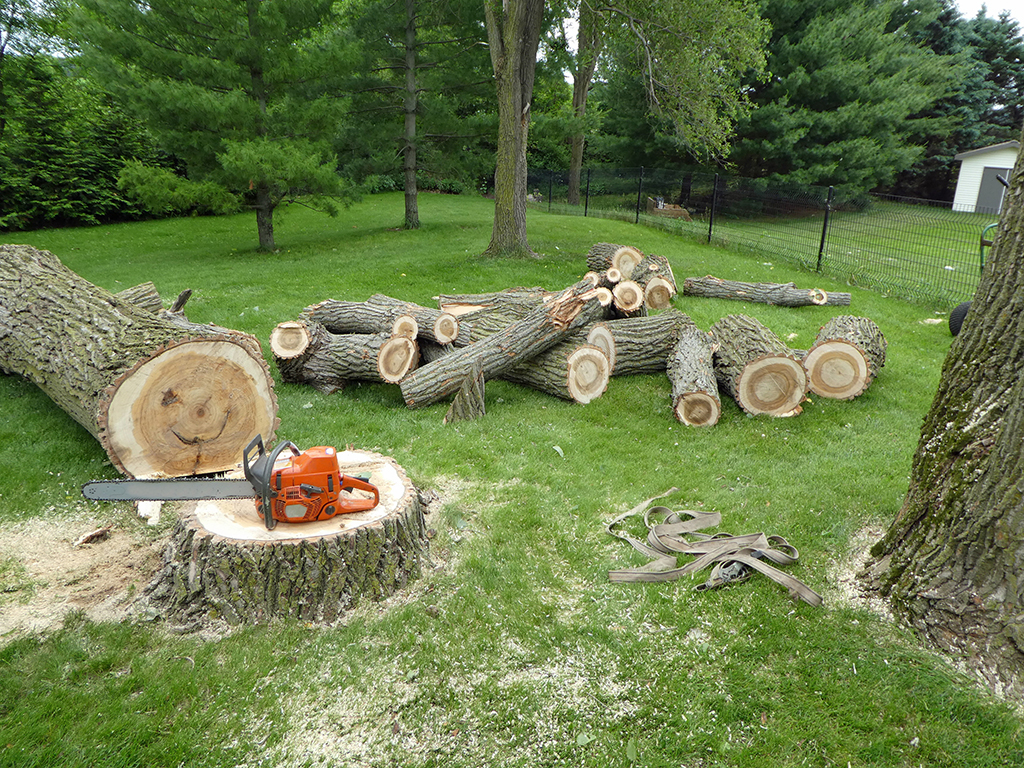
Here’s a detailed look at what you’ll typically find in your yard the day after a tree is removed and what it really means for your landscape.
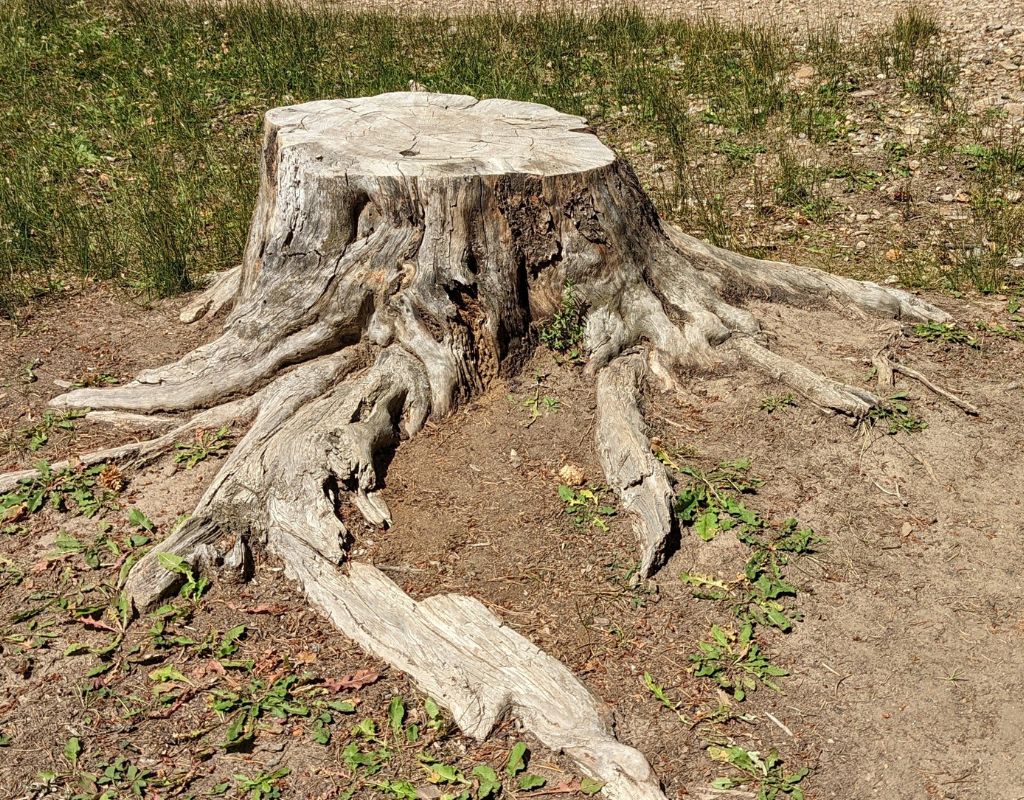
1. The Leftover Stump: Tall, Flush, or Buried
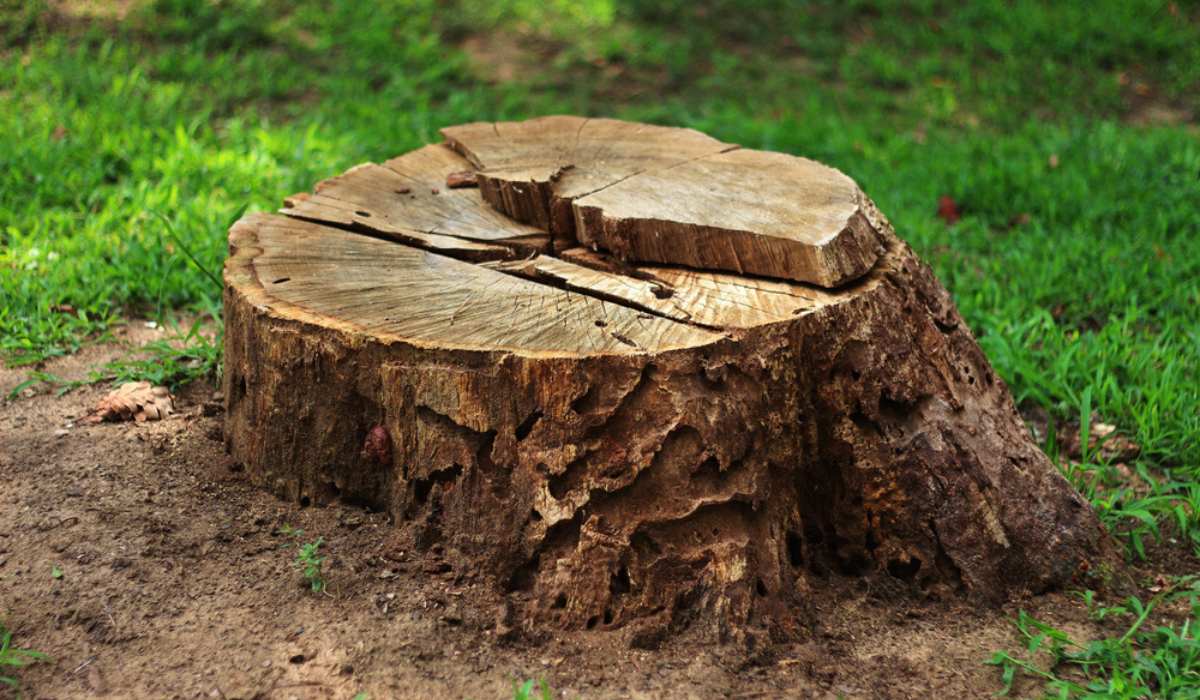
Once the tree is gone, unless you’ve scheduled stump grinding and removal services, the stump is usually left behind. It might stand several inches tall, sit flush with the ground, or, if stump grinding was done, it may be just below soil level but still there.
A tall stump (6–12 inches high) sticks out visibly and becomes a trip hazard. It’s also an eyesore.
A flush stump may look neater, but it still creates issues like sucker growth or root decay underground.
A ground stump (if grinding was done) means the top part is gone, but roots can still spread several feet outward—which can cause soil to settle later on.
If nothing’s done, the stump and roots begin to decompose, which is a slow process that could take years depending on the size of the tree and the type of soil. In the meantime, the area may sink, attract pests, or sprout suckers from the remaining root system.
2. Exposed Roots, Root Flare, and a Rough Hole
If the removal involved digging or a strong wind had already knocked over the tree, like during emergency storm damage tree removal, you might see exposed root systems or a crater-like hole where the trunk used to be. This often reveals the root flare—the wide base where the trunk meets the major roots.
This leftover hole poses several problems:
It’s uneven and unsafe to walk on.
Water can pool here, especially in clay-heavy NJ soils, increasing the risk of erosion.
The soil is often dry or compacted around the edges, making it hard for grass or new plants to grow.
In most cases, the hole needs to be filled with clean topsoil or a topsoil-compost blend to support healthy new growth or stabilize the ground.
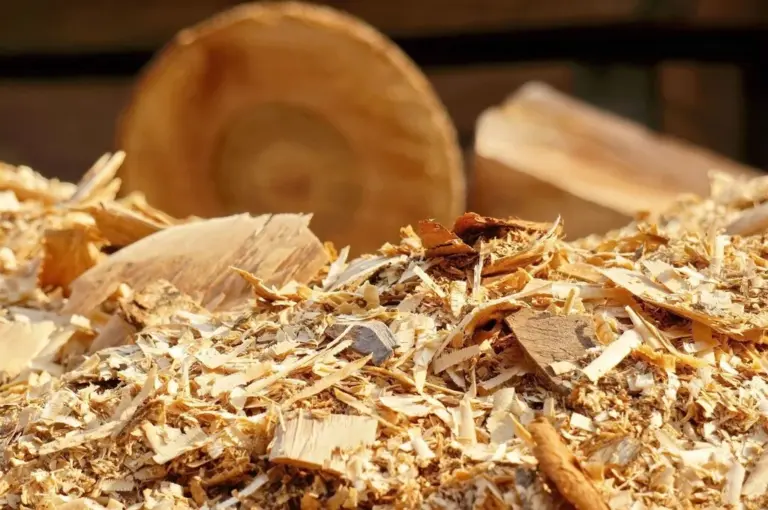
3. Wood Chips, Sawdust & Branches Everywhere
During tree removal, branches are often chipped on-site, and the saw creates fine sawdust that spreads across your lawn. The grinding process also leaves behind a mound of mixed chips and soil.
These materials:
Smother your grass if left sitting too long
Interfere with replanting and lawn seeding
Attract insects like carpenter ants or even termites if left near foundations
Tie up nitrogen in the soil as they break down, making it harder for new plants to grow
While wood chips can be reused as mulch (after aging), it’s best to remove the excess chips from the grinding area, especially if you plan to plant new grass or a tree in the same spot.
4. Compacted or Uneven Soil
When a large tree is removed, heavy equipment like bucket trucks, cranes, or stump grinders often roll across the yard. These machines can compact the soil, especially in damp areas or clay soils, which are common in many parts of New Jersey.
Compacted soil becomes:
Hard like concrete
Poor at absorbing water
Bad for grass seed or tree roots trying to grow
Uneven soil is another concern. After grinding or root removal, the area may look bumpy or feel spongy underfoot. That’s a sign of air pockets from decaying roots or improper backfilling, and it could lead to dips or sinkholes in the coming months.
To fix this, you’ll need to:
Rake out any loose debris
Add topsoil
Gently tamp or roll the surface
Regrade for drainage so water flows away from your home or structures
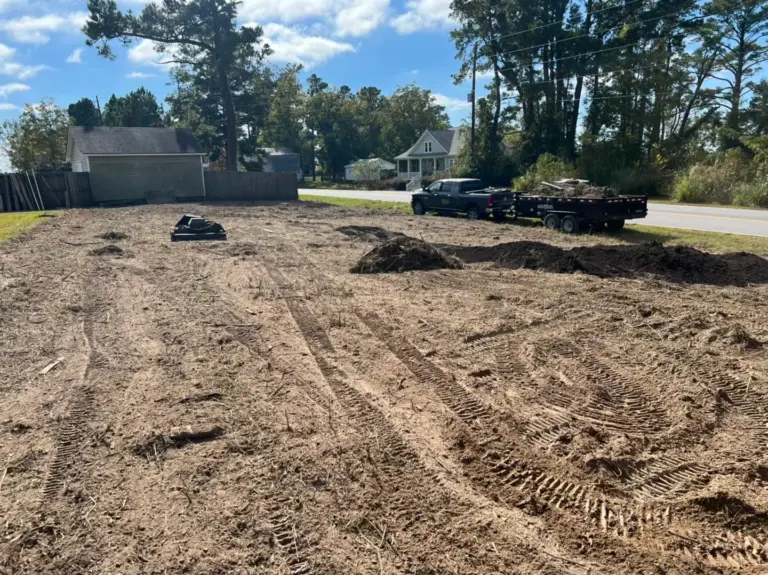
5. Tire Ruts, Lawn Damage & Soil Disruption
Tree crews do their best to protect your yard, but lawn damage is hard to avoid during major tree removal—especially with large trees near homes, driveways, or fences.
You might notice:
Tire ruts cutting deep through the turf
Broken sprinkler heads or irrigation lines
Damaged landscaping (flowers, shrubs, walkways)
These issues aren’t just cosmetic. Left unchecked, compacted ruts can collect water, attract mosquitoes, and kill off grass roots. A good cleanup involves:
Lifting and fluffing the compacted turf
Adding seed and topsoil
Aerating compacted areas to help air and water reach the roots
6. Soft or Spongy Ground
In many cases, especially after stump grinding, the ground feels unusually soft. This can happen because:
Chips were backfilled instead of topsoil
Roots below are starting to break down
There are gaps or hollow spots in the soil
You may not notice it right away, but over time, this area may sink or settle unevenly, especially after a few heavy rains or freeze-thaw cycles in NJ winters.
It’s important to revisit this spot after a month or two, monitor the settling, and re-fill with clean topsoil as needed.
What Happens Next Depends on Your Plans
Once you’ve cleared the debris, removed or ground the stump, and leveled the soil, your next step depends on how you plan to use the space.
Planting a new tree? You’ll need proper soil prep and probably some root system removal.
Installing a patio or shed? You’ll need complete root removal and solid compaction.
Seeding grass? You’ll need fresh topsoil, gentle grading, and regular watering.
Creating a garden? You’ll want to amend the soil with compost and remove any old chips.
Each of these next steps depends on starting with a clean, safe, and properly leveled base. The sooner you handle post-removal cleanup, the sooner your yard can recover—and look even better than before.
What Happens to the Roots After Tree Removal?
When a tree is removed, most people focus on what’s above the ground—the trunk, the branches, and the stump. But the real story continues underground. Even if the stump is ground down, the root system is usually left in place, silently breaking down over the next several months—or even years.
These buried roots don’t just disappear overnight. And if they’re not handled properly or monitored closely, they can cause unexpected problems in your yard long after the tree is gone.
How Tree Roots Remain After Removal
Even a standard stump grinding service usually only grinds the stump 6–12 inches below the surface. That still leaves behind a massive underground structure—especially for mature trees with large lateral roots and deep anchors. In some species, roots can spread 2 to 3 times wider than the tree’s canopy.
So what happens to all that buried wood?
It begins to decompose, slowly. This natural process involves fungi, bacteria, moisture, oxygen, and time. As the roots rot, the soil around them shifts, settles, or even becomes unstable depending on the conditions.
Root Decay Timeline: How Long Does It Take?
The speed of decomposition depends on a few key factors:
1. Tree Species
Different trees break down at different rates.
Hardwoods like oak, maple, and ash take 5–10 years to rot fully.
Softwoods like pine or birch may decompose in 3–5 years.
Trees with dense or oily wood (like black locust or cedar) take even longer.
2. Soil Type
Soil conditions affect how fast oxygen and microbes reach the roots.
Clay-heavy soils (common in North and Central NJ) hold water and slow decay. Roots rot slowly and can cause prolonged soil settling.
Sandy soils (like those in South Jersey or the Pine Barrens) allow for quicker decomposition, but the loose soil settles faster, which may cause sinkholes or depressions.
3. Moisture & Drainage
If the area is constantly wet (from poor drainage or rainfall pooling), roots may decay anaerobically (without oxygen), which is much slower and may lead to foul smells or fungal growth.
If the area stays dry, the decay slows down too. Ideally, a balance of moisture and air helps roots break down efficiently.
Root Suckers (Unwanted Tree Regrowth)
Some tree species are notorious for trying to regrow from leftover roots. These regrowths are called suckers, and they pop up as thin shoots either from the stump or from the spreading roots underground.
Common offenders include:
Poplar
Black locust
Willow
Tree-of-heaven (an invasive species common in NJ)
Suckers grow fast and can sap nutrients from nearby plants. If not cut regularly, they can become a dense, tangled mess. Worse, they may damage sidewalks, fences, or pipes as the roots try to re-establish a new tree.
Tip: If you’ve removed a sucker-prone species, monitor the area every few weeks. Use a broadleaf herbicide if needed, or consider full root removal during the initial project.
Drainage Issues and Soil Stability
As roots break down, they create voids in the soil. Rainwater, irrigation, or snowmelt may collect in these pockets instead of draining naturally. This creates boggy spots or soggy patches that won’t dry properly—especially on clay-heavy NJ soil.
Poor drainage can lead to:
Root rot in newly planted trees or shrubs nearby
Fungal growth or lawn disease
Structural problems if it’s near patios, walkways, or foundations
Tip: In areas with poor drainage, consider:
Adding French drains or surface drains
Amending soil with compost and sand to improve porosity
Using erosion-control products like coir logs or straw wattles on slopes
What You Should Do About It
You don’t need to panic, but you do need to plan ahead. Here’s how to stay on top of post-removal root issues:
Monitor the Area Every Season
After rainstorms, walk the area and look for dips, puddles, or spongy spots
Mark settling areas with stakes and track changes
Refill low spots with fresh topsoil (not mulch or grindings)
Keep Suckers in Check
Prune or cut back shoots immediately
Apply a targeted herbicide to the base of stubborn suckers
Don’t mow over suckers—it just makes them multiply
Test the Soil Before Planting
Especially if you plan to replant in the same spot, use a Rutgers Soil Test Kit to check:
Soil compaction
Nutrient levels
Organic matter and pH
Aerate and Regrade
For compacted areas, aerate the soil using a plug aerator or broadfork. Then regrade the site with a 2% slope away from buildings to restore healthy water flow.
Wood Chips, Logs, and Brush: Keep or Haul Away?
After removal, you’ll usually see piles of wood chips and leftover trunk sections. You have a few options here.
Wood Chips
These are useful if managed well:
Mulch for trees and shrubs (keep chips a few inches from trunks)
Garden paths to stop weeds
Compost with high-nitrogen materials like grass clippings
Avoid using fresh chips right where you plan to plant. They use up nitrogen in the soil as they break down, making it harder for new plants to grow.
Logs and Brush
You can:
Cut logs for firewood (stack and season them for 6–12 months)
Use a chipper to turn branches into mulch
Haul everything away (many tree companies include this in cleanup)
NJ towns like Washington and Clinton have green waste collection services or drop-off sites. Check with your local public works.
Grading and Fixing the Ground After Tree Removal
After the tree is gone and the stump is ground out, what’s left behind is usually not a smooth, plant-ready surface. Most of the time, you’re dealing with a rough patch of soil, a sunken hole where the stump used to be, and a pile of loose wood chips.
That area might look like just a cosmetic problem—but if it’s not fixed properly, it can cause bigger issues down the road like soil erosion, drainage problems, and foundation damage.
Here’s how to handle grading and ground repair the right way—especially if you live in areas like New Jersey, where soil types can change dramatically from one county to the next.
Step 1: Remove Leftover Chips and Debris
After stump grinding, the hole is often filled with a mixture of wood chips, sawdust, and dirt. This blend may seem okay to leave in place, but over time, it becomes a problem.
Why You Should Remove It:
Wood chips decompose and shrink, causing the soil to settle unevenly.
They pull nitrogen from the surrounding soil, making it harder for new grass or plants to grow.
As they rot, they may attract pests or create air pockets underground.
What to Do:
Shovel out all visible chips, especially those inside the stump hole.
Use a rake or pitchfork to lift compacted debris.
Haul it to a compost pile, green waste bin, or municipal recycling site.
Don’t use this mix as topsoil or planting base—it lacks nutrients and holds too little moisture.
Step 2: Backfill the Hole with Screened Topsoil
Once the debris is out, you’re left with a hole—and it’s often deeper than you think. Even if it’s only a few inches on the surface, root systems extend deep and wide.
Why Screened Topsoil?
It’s free of rocks, sticks, and debris, which allows for better compaction.
It helps with water absorption, especially in areas with clay-heavy soils.
It provides a strong base for future landscaping, planting, or sod installation.
How Much Do You Need?
For a small tree (under 12” stump diameter), expect to use ½ to 1 cubic yard of topsoil.
For larger trees, or where stump removal created a big void, you might need 2–3 cubic yards or more.
Pro Tip: Layer soil in 4–6 inch lifts (layers) rather than filling the entire hole at once. This helps you compact it better and avoid settling later on.
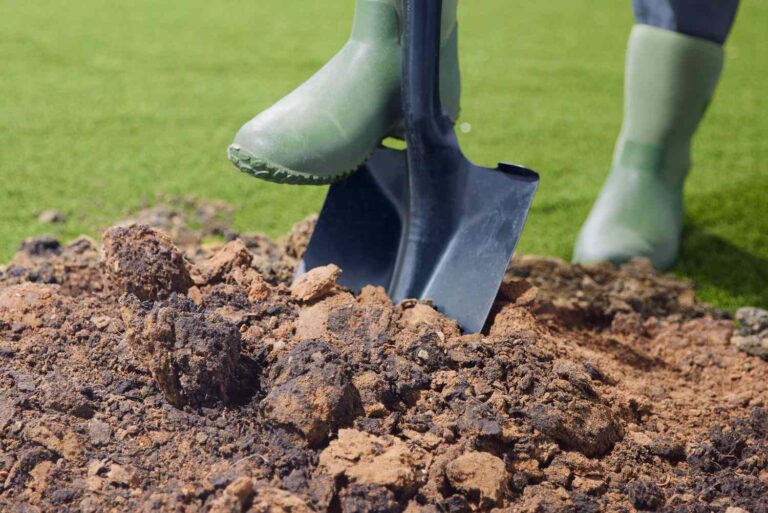
Step 3: Tamp and Compact the Soil
This step is often skipped—but it makes a huge difference. If you just dump in soil and walk away, it will settle unevenly after the first few rains, leaving dips and trip hazards.
Tools You Can Use:
Manual hand tamper: Great for small areas (flat plate on a stick; affordable and effective).
Lawn roller: Filled with water or sand and pushed across the soil to compact it.
Plate compactor: Gas-powered tool ideal for large areas or hard clay soil.
How to Do It:
After each 4–6 inch layer of soil, tamp it down before adding the next.
Check for low spots by placing a straight 2×4 board across the area and looking for gaps.
Water the area lightly to help settle soil naturally—but don’t overwater.
Step 4: Regrade for Proper Water Flow
Once the ground is level, your next goal is to shape the area so water flows away from your home, garage, or shed. Water that pools near foundations causes major damage over time, especially in New Jersey where freeze-thaw cycles are common.
Ideal Grading Slope:
A 2% slope is best: that’s about 2 inches of drop per 10 feet away from structures.
Use a long leveling rake, string line, or laser level to measure your grade.
In tight spaces (between buildings, fences, or walkways), use a shovel and level to shape subtle angles.
Key Areas to Grade:
Near foundations
Along walkways or patios
Areas where the old tree caused a depression or water puddling
Slopes that direct water toward your neighbor’s property (avoid this—it may violate local ordinances)
Step 5: Check for Drainage Issues in Clay-Rich or Soggy Areas
If your yard is prone to standing water—especially in heavy clay soil areas of NJ like Warren, Hunterdon, or Morris County—grading alone may not solve the problem.
Signs of Poor Drainage:
Water puddles that stick around for more than 24 hours after rain
Spongy or muddy soil
Moss or algae growing on bare ground
Dead grass patches from excess moisture
Fixes You Can Add:
French Drains: A perforated pipe buried under gravel to redirect water away from the area
Surface Trenches: Shallow, sloped ditches that carry runoff downhill
Dry Creek Beds: Decorative gravel channels that help drain water in landscaped yards
Erosion Blankets or Straw Matting: Hold soil in place on hillsides or slopes
If replanting grass, use erosion control fabric to stop seeds from washing away during the first few rainstorms.
Bonus: Stabilizing Slopes or Hillsides After Tree Removal
If the tree was on a slope, removing it might destabilize the bank. Roots help hold soil in place, and once they rot, the ground becomes looser and prone to erosion.
To protect slopes:
Add deep-rooted ground cover like creeping juniper or switchgrass
Install coir logs or straw wattles as temporary barriers
Use landscape timbers or retaining blocks for small terraces
Soil Prep for Replanting in NJ
If you’re planning to plant a new tree, flowers, or grass, soil prep is key—especially in New Jersey’s varied soils.
Know Your Soil Type
Northern NJ: Clay soils—dense, slow to drain
Central NJ: Loam and sandy loam—good balance
Southern NJ/Pine Barrens: Sandy—drains fast, low nutrients
Step-by-Step Soil Prep:
Test your soil: Use Rutgers Soil Testing Lab (you’ll get pH, nutrients, and organic matter levels)
Amend your soil:
Add compost or peat to sandy soils
Add gypsum to loosen clay
Apply lime or sulfur based on pH needs
Till or mix the amendments to at least 6 inches deep
Wait 1–2 weeks after grinding before planting
When planting a new tree, make sure the root flare is visible above ground
Lawn Repair or New Landscaping
Once your soil is set, it’s time to bring your yard back.
Grass Seeding:
Rake the area smooth
Spread starter fertilizer
Apply seed or lay down sod
Water daily for the first 2–3 weeks
Planting a New Tree:
Choose native or adapted species (red maple, dogwood, river birch, or serviceberry)
Dig wide but shallow holes
Mulch around the base, but don’t pile against the trunk
Want to build a patio or deck instead? Make sure the soil is fully compacted and that there are no organic materials under the base.
Safety, Permits, and Utilities After Tree Removal
After a tree is removed and you’re ready to move forward with planting, grading, or building, there’s one part many homeowners overlook: safety and compliance. It’s not just about your own property—it’s about underground utilities, local laws, and protecting both people and infrastructure. A few simple steps now can prevent dangerous accidents, expensive fines, or even legal trouble later.
Here’s exactly what you need to know about permits, underground utilities, and local ordinances—especially if you live in New Jersey.
1. Call Before You Dig – 811
811 is the national “Call Before You Dig” hotline. It’s required by law before you dig more than a few inches into the ground, even on your own property.
Why It Matters:
Many utility lines are buried shallow—just 6 to 24 inches deep—and you’d be surprised how often people hit them. Underground lines may include:
Natural gas
Water and sewer pipes
Electrical conduits
Cable and fiber optic internet
Irrigation or septic lines (especially in rural NJ)
Hitting any of these can lead to:
Explosions or fires (in the case of gas)
Electrocution
Flooding or sewage backups
Loss of internet or phone service
Expensive repairs (you may be held liable)
How 811 Works:
Call or submit a request at www.nj1-call.org at least 3 business days before you plan to dig.
Utility companies will send locators to your property to mark underground lines with colored flags or spray paint.
Each color has a meaning:
Red – Electric power lines
Yellow – Gas, oil, steam
Blue – Potable water
Green – Sewer and drain
Orange – Communications
White – Area of proposed excavation
The marks stay in place for about 10 business days, so plan your digging accordingly.
Pro Tip: Even shallow digging for tree planting or grading can damage lines. When in doubt—always call 811.
2. Tree Removal and Replanting Permits in New Jersey
New Jersey isn’t a one-size-fits-all state when it comes to tree laws. Each municipality has its own regulations, and some are strict—especially if you live in a historic district, near wetlands, or under a Shade Tree Commission.
Common Permit Requirements:
Removing healthy trees over a certain diameter (often 6”–12” DBH)
Removing multiple trees within a short time span
Trees near public roads, sidewalks, or rights-of-way
Trees on sloped or environmentally sensitive lots
Trees within flood zones or protected watersheds
Cities and Towns in NJ That Commonly Require Permits:
Princeton – Tree removal permits are required for trees 8” DBH or more; replanting may also be required
Montclair – Tree Protection Ordinance restricts removal and requires planting of replacements
Hoboken & Jersey City – Heavily regulated street tree removal; permits and inspections required
Clinton Township – Applies permits for clearing trees larger than 8″ diameter and for certain species
Bernardsville, Summit, and Westfield – Often require permits for trees removed near property lines, sidewalks, or drainage basins
Tip: Even if you’re removing a dead tree, some towns require an arborist report or photos as proof before granting a permit exemption.
If you’re unsure about your town’s rules, visit our guide on tree removal permits in New Jersey
3. Shade Tree Commissions and Protected Species
In many NJ towns and boroughs, Shade Tree Commissions are in charge of all trees in public areas—sidewalk strips, medians, and sometimes even trees near your driveway if they were planted by the township.
These commissions often:
Manage tree inventories
Approve or deny removal requests
Select approved tree species for replanting
Set guidelines for spacing, root barriers, and pruning
If you plan to remove or replant near the curb line, check with your local shade tree board. Even trimming limbs from a street tree may require permission.
Protected or Native Species in NJ:
Some townships place additional protection on certain native or endangered tree species, like:
White oak
American beech
Black gum (Nyssa sylvatica)
Atlantic white cedar (in Pinelands region)
Sweetbay magnolia
4. Wetlands, Buffer Zones, and Environmental Considerations
If your property borders a stream, wetland, or conservation area, you may need DEP (Department of Environmental Protection) approval for any tree work.
NJDEP enforces:
Buffer zones (usually 50–300 feet) around waterways and wetlands
Critical slope protections
Stormwater runoff and erosion control standards
You may need to:
Submit an Environmental Impact Form
Limit tree removal to certain times of year (to protect nesting wildlife)
Use specific erosion-control methods (like silt fences or straw wattles)
5. Inspections and Fines for Non-Compliance
Failure to comply with utility or permit rules can be costly.
Possible Consequences:
Up to $5,000/day in fines for unauthorized digging or tree removal
Legal orders to stop work and restore the property
Denied permits for future projects like driveways or additions
Removal of incorrectly planted trees at your expense
Utility damage also comes with:
Repair bills from the utility company
Temporary loss of services (you, your neighbors, or entire blocks)
Criminal charges in extreme cases (gas line ruptures)
6. Best Practices Before You Dig or Replant
- Call 811 at least 3 days before any digging, even shallow
- Contact your local town hall or zoning office to check permit requirements
- Ask if your town has a Shade Tree Commission Get documentation if your tree was dead, hazardous, or storm-damaged
- Hire a licensed tree care company that knows local rules (like Midstate Tree)
- Use native or approved species for replanting—ask for your town’s list Document all work with before-and-after photos in case of future disputes
Post-Removal Cleanup Checklist & Timeline
| Timeframe | Action |
|---|---|
| Day 1 | Tree cut, stump ground or removed |
| Day 2–3 | Wood chips cleared, soil backfilled |
| Week 1 | Soil compacted, grade restored |
| Week 2 | Soil test submitted (Rutgers) |
| Week 3–4 | Soil amendments added, lawn or trees planted |
| Month 1–3 | Monitor for settling, water new plantings, reseed as needed |
Final Thoughts
Tree removal is just the first step in a larger project. What happens next—from stump grinding and chip removal to soil repair and planting—makes the biggest difference in how your yard looks and works.
Whether you want to plant a new tree, seed your lawn, or build a patio, taking care of the roots, soil, and ground now will save time and money later.
Need Help With Post-Removal Services in NJ?
Midstate Tree offers expert tree removal, stump grinding throughout Warren and Hunterdon County.
📍 Located in Washington, NJ
📞 Call 908-283-5755
🕒 Available 24/7
📩 Request a Free Quote
Let us help you take the next step after tree removal—your yard deserves it.